Using Pixi as a Development Environment for ROS 2
2025-08-23
When starting a new ROS 2 project with multiple team members, establishing a reproducible development environment is crucial for success. Without it, you'll inevitably face the classic "works on my machine" problem, where code that runs perfectly for one developer fails mysteriously for another.
What is RoboStack?
RoboStack brings the Robot Operating System (ROS) to any platform - Linux, macOS, and Windows - using the Conda package manager. Unlike traditional ROS installations that are Linux-specific and require system-level packages, RoboStack packages ROS distributions (like Humble and Jazzy) as Conda packages that can be installed without root access.
This approach enables easy integration of ROS with machine learning libraries like PyTorch and Flax in the same environment, making it perfect for robotics research that combines traditional robotics with modern AI workflows.
Enter Pixi: A Unified Development Solution
One approach I used in the past was to create a Docker image that encapsulated all the dependencies and configurations needed for the project. This worked well for ensuring consistency across machines, but it also introduced significant complexity and frustration (see Appendix: Docker Challenges for details).
In this post, I'll introduce pixi as a modern alternative for creating reproducible ROS 2 development environments.
What Pixi Brings to the Table
-
Three tools in one:
- Task runner (Replaces Makefile)
- Dependency management (combines conda and PyPI through uv) with a lock file
- Multi-environments management.
-
ROS 2 integration through RoboStack project.
- Simple multi-distro support: Easy switching between ROS 2 distributions.
- Python integration: Ensuring ROS 2 and Python dependencies are compatible.
For comprehensive documentation, visit pixi.sh.
Getting Started: Initial Setup
Begin by initializing Pixi in your project directory:
pixi init
Next, configure the appropriate channels. The channel selection depends on your target ROS 2 distribution. You can either manually edit your pixi.toml file or use the CLI:
# Add RoboStack channel for your desired ROS 2 distribution
pixi workspace channel add https://prefix.dev/robostack-jazzy
This will update your pixi.toml file with:
channels = ["conda-forge", "https://prefix.dev/robostack-jazzy"]
Replace robostack-jazzy with your desired ROS 2 distribution (e.g., robostack-humble for Humble).
ROS 2 Base Dependencies
Add ROS 2 dependencies using the CLI:
# Add one of the following based on your project needs:
pixi add ros-jazzy-ros-core        # Minimal core functionality
pixi add ros-jazzy-ros-base        # Standard base installation (recommended)
pixi add ros-jazzy-desktop         # Desktop environment with GUI tools
pixi add ros-jazzy-desktop-full    # Complete desktop installation
Pro Tip: Use the prefix.dev package explorer to browse available packages and their dependencies. For CLI users, run: pixi search --channel https://prefix.dev/robostack-jazzy ros-jazzy-desktop
For common development tools, add them with:
pixi add colcon-common-extensions colcon-mixin cmake ninja mold sccache
Dependency Management Strategy
I'm not aware of a tool that automatically extracts dependencies from package.xml files and updates the pixi.toml file. Hence, you will need to either manually add the required packages to your pixi.toml through the pixi add <package-name> command or by creating a script that parses package.xml files and updates the pixi.toml file accordingly with pixi add $(my-cool-vibe-coded-script).
Task Automation
Define your tasks using the CLI:
pixi task add build "colcon build"
pixi task add test "colcon test" --depends-on build
Execute tasks with simple commands:
pixi run test # Automatically runs build first, then test
Advanced Task Features Worth Exploring: - Task arguments for parameterized execution - Task caching for improved performance
Multi-Environment Support
One of Pixi's most powerful features is seamless multi-environments support. You can set this up using CLI commands:
# Setup Humble environment
pixi workspace channel add https://prefix.dev/robostack-humble --feature humble
pixi workspace environment add humble --feature humble
pixi add ros-humble-ros-base --feature humble

# Setup Jazzy environment
pixi workspace channel add https://prefix.dev/robostack-jazzy --feature jazzy
pixi workspace environment add jazzy --feature jazzy
pixi add ros-jazzy-ros-base --feature jazzy
This creates the following configuration in your pixi.toml:
[feature.jazzy.dependencies]
ros-jazzy-ros-base = "*"

[feature.humble.dependencies]
ros-humble-ros-base = "*"

[environments]
humble = { features = ["humble"] }
jazzy = { features = ["jazzy"] }
Switch between environments effortlessly:
pixi shell -e jazzy   # Enter Jazzy environment
pixi shell -e humble  # Switch to Humble environment
You can also create specialized environments for different purposes:
# Setup linting environment
pixi add pre-commit --feature lint
pixi workspace environment add lint --feature lint --no-default-feature
pixi task add lint "pre-commit run --all-files" --feature lint
pixi run lint
This eliminates the need for multiple Docker containers.
PyPi dependencies
Pixi uses uv for managing PyPI dependencies alongside Conda packages. To add PyPI packages, use:
pixi add --pypi numpy scipy matplotlib
It also supports extras. For example, to add Flask with async support:
pixi add --pypi flask[async]
This will update your pixi.toml file with:
[pypi-dependencies]
flask = { version = ">=3.1.2, <4", extras = ["async"] }
If you want to add a source python package, you can do so by specifying the path:
[pypi-dependencies]
my_cool_library = { path = "./my_cool_library", editable = true, extras = ["dev"] }
Cross-Platform Support
Most of the RoboStack packages are available in linux-64, linux-aarch64, osx-64, osx-arm64, and win-64. If you are lucky enough and all your other dependencies are available on these platforms, you can use Pixi to create a cross-platform ROS 2 development environment.
Streamlined CI/CD Workflows
This part is what I'm mostly excited about when using Pixi. Pixi ensures that:
- Local development environments match CI exactly
- Failed tests can be debugged locally with identical conditions
- No more "works on my machine" scenarios
While tools like industrial_ci remain valuable, Pixi's reproducibility makes debugging significantly more straightforward.
Example Implementation
For a practical demonstration, explore this complete ROS 2 project using Pixi: pixi_ros2_example.
The project showcases: - Dual support for Humble and Jazzy distributions - Clean, self-contained structure - Automated CI/CD integration
Project Structure:
project_root/
├── .github/workflows/ci.yaml    # CI/CD configuration
├── pixi.toml                    # Project configuration
├── pixi.lock                    # Dependency lock file
├── colcon_defaults.yaml         # Colcon settings
├── build/                       # Build artifacts
├── install/                     # Installation directory
├── pkg1/                        # ROS 2 package 1
├── pkg2/                        # ROS 2 package 2
└── ...
Bonus: Git Worktree Integration
I'm a big fan of git-worktree. With this approach, I can easily manage multiple branches of the same repository without needing to clone it multiple times or stash changes when switching branches. This is particularly useful for ROS 2 development, where you might want to work on multiple features or bug fixes simultaneously.
Simply running git worktree add ../worktree_dirname branch_name creates a new directory with the specified branch checked out, allowing you to work on it independently.
Current Limitations and Considerations
- Synchronizing dependencies from package.xml: You will need to manually add dependencies from
package.xmlto thepixi.tomlfile. This is a bit of a hassle, but manageable. - ros-testing packages: Currently, RoboStack does not provide packages from the
ros-testingrepository. - Stability concerns: Pixi is still not stable, and some features are experimental. For example, in previous versions of pixi, having an environment variable in the
activationsection ofpixi.tomlwould cause the value to be expanded, but it stopped working in v0.51.0 and was reverted in v0.52.0. This can lead to unexpected behaviors. Fortunately, you can pin the pixi version in yourpixi.tomlfile to avoid such issues using requires-pixi.
[activation.env]
# In v0.51.0 the expansion is not performed, so the value is literally "$CONDA_PREFIX/my_env_var"
MY_ENV_VAR="$CONDA_PREFIX/my_env_var"
- Specialized hardware support: For Jetson machines, NVidia provides custom builds for PyTorch/TorchVision that require specific handling. Using standard PyPI/Conda packages would cause segfaults or crashes. The best solution I'm aware of for this specific case is still using Docker.
Update: Experimental Build Backends for ROS Packages
Austin Gregg-Smith and Silvio Traversaro told me about an exciting new feature in Pixi, it now includes experimental build backends that can build ROS 2 packages directly from source code.
See ros_workspace for an example of how to use this feature.
Conclusion
As someone who has been working in robot learning where projects require a mix of Python and C++ codebases alongside complex dependency management spanning both ROS 2 and ML frameworks, Pixi has been a game-changer. The ability to seamlessly manage conda-forge packages for ROS 2 components alongside PyPI packages for machine learning dependencies in a single, reproducible environment has dramatically reduced development friction and allowed me to iterate much faster.
Appendix: Advanced Pixi Usage
Beyond ROS 2, I've successfully used Pixi to build complex projects like OMPL, MuJoCo, MuJoCo MPC, and llama.cpp from source - you can find these configurations in my pixi_workspaces repository.
Appendix: Docker Challenges in ROS 2 Development
Having worked with Docker for ROS 2 development, the typical workflow involves three files: a Dockerfile with several stages (base image with ROS 2 installed, dependency installation, build stage to compile ROS packages, and final dev stage with necessary tools), a docker-compose file defining services like the dev environment and CI/CD testing that mount the workspace and set environment variables, and finally a Makefile that orchestrates the build and run commands.
However, this approach has several significant drawbacks:
-
Reproducibility issues: To truly ensure reproducibility, you need to pin every dependency version in the Dockerfile: system & ROS 2 packages (via apt), Python packages (via pip). While ROS 2 provides a snapshot repository after each release and distro (snapshot repository), you still need to create custom scripts to scrape package.xml files and requirements.txt files to generate lock files containing all dependencies and their versions. As far as I know, no tool does this automatically for ROS 2 packages. You also need to ensure PyPI dependencies are compatible and won't cause runtime errors due to version mismatches.
-
Slow build times: If you are not careful with your docker build's context, you can end up with invalidating the Docker cache for every build, leading to long build times and slow development cycles.
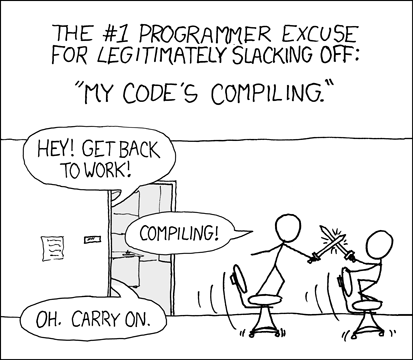
Typical xkcd developer waiting for Docker to build a ROS 2 workspace.
-
Image size bloat: Docker images become massive, especially when adding CUDA and other heavy dependencies
-
Disk space consumption: Docker images can take up a lot of disk space, just run
docker system dfto see how much space is consumed.
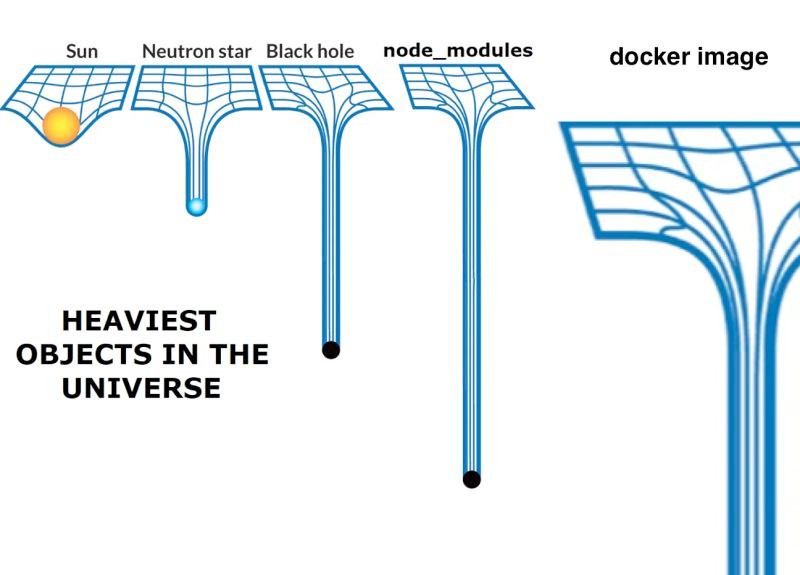
Heaviest objects in the universe: neutron stars, black holes, and Docker images. (Source: Bluesky post)
- Development Workflow Friction: This might be specific to robot learning + ROS 2 workflows. It's often much simpler to create a virtual environment with uv or poetry for ML code, install dependencies directly, and run your models. However, this approach creates two separate environments: one for ROS 2 packages and another for machine learning code. This split leads to integration challenges when you finally want to deploy your trained model on the robot. (Note that Conda isn't a viable solution here either, as both apt-provided ROS 2 and Conda modify environment variables in conflicting ways.)
Acknowledgments
Thanks to Sam Pfeiffer and Sebastian Castro for reviewing this post and providing helpful feedback.